Replace Thermal Coupling on Gas Water Heater: A DIY Guide
Imagine this: you’re looking forward to a hot shower after a long day, but when you turn on the faucet, all you get is cold water. Frustrating, right? One possible culprit behind this inconvenience could be a faulty thermal coupling on your gas water heater.
While calling a professional plumber is always an option, understanding how to replace a thermal coupling yourself can save you time, money, and unnecessary hassle. This comprehensive guide will delve into the world of gas water heaters, focusing on the crucial role of the thermal coupling and providing a step-by-step guide on how to replace it.
Understanding the Significance of a Thermal Coupling
Before we jump into the replacement process, let’s understand what a thermal coupling is and why it’s vital for your gas water heater’s safe operation. In essence, a thermal coupling is a safety device that prevents gas leaks. It works in conjunction with the gas control valve to ensure that the gas supply to the burner is cut off if the pilot light goes out.
How Does a Thermal Coupling Work?
A thermal coupling consists of two dissimilar metals joined together at one end. When heated by the pilot light, this junction generates a small voltage, which powers an electromagnet in the gas control valve. This electromagnetic force keeps the gas valve open, allowing gas to flow to the burner. If the pilot light extinguishes, the thermal coupling cools down, the voltage drops, and the electromagnet releases the valve, shutting off the gas supply. This safety mechanism prevents unburnt gas from accumulating, which could lead to dangerous explosions.
Common Signs of a Faulty Thermal Coupling
Now that you understand the importance of a thermal coupling, let’s explore the telltale signs that indicate it might be time for a replacement:
- The pilot light won’t stay lit: This is often the most obvious sign of a faulty thermal coupling. If you find yourself constantly relighting the pilot light, there’s a good chance the thermal coupling is not generating enough voltage to keep the gas valve open.
- The water heater produces lukewarm or cold water: If the pilot light keeps going out, the burner won’t ignite, resulting in little or no hot water.
- You smell gas near the water heater: A strong gas odor is a serious red flag and could indicate a gas leak, potentially caused by a malfunctioning thermal coupling.
Step-by-Step Guide to Replacing a Thermal Coupling
Replacing a thermal coupling is a relatively straightforward task that most homeowners can handle with a few basic tools. Here’s a detailed guide to walk you through the process:
Tools You’ll Need:
- Adjustable wrench
- Pipe wrench
- Screwdriver
- Replacement thermal coupling (compatible with your water heater model)
Safety First:
- Turn off the gas supply: Locate the gas valve that controls the supply to your water heater. It’s usually located near the unit and will have a handle that you can turn to the “off” position.
- Turn off the water heater: Turn off the power supply to the water heater at the circuit breaker. For gas-only models, turn the thermostat to the “pilot” setting.
- Let the water cool down: Allow ample time for the water inside the tank to cool down before proceeding.
Replacement Procedure:
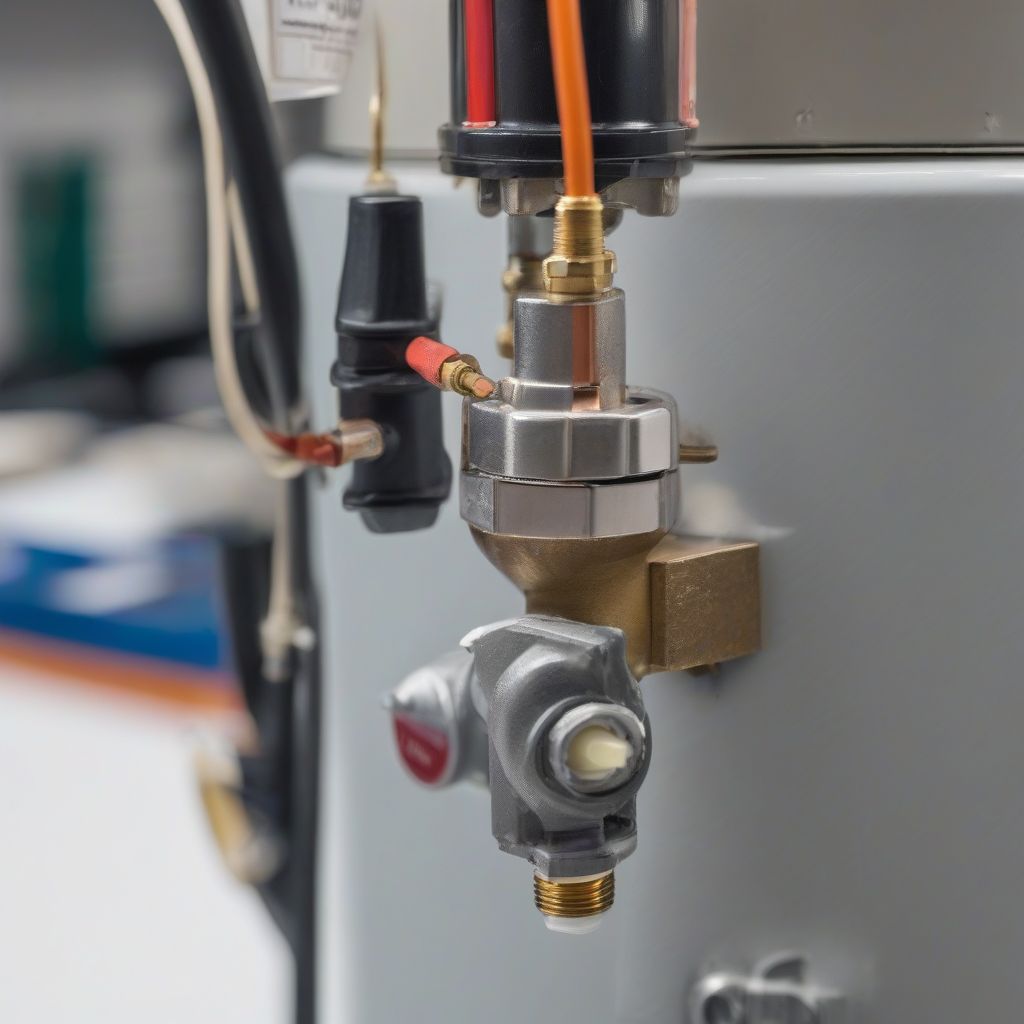
- Locate the thermal coupling: The thermal coupling is usually a thin copper tube connected to the gas control valve, located near the bottom of the water heater.
- Disconnect the thermocouple: Use an adjustable wrench to loosen and disconnect the thermal coupling nut from the gas control valve.
- Remove the old thermal coupling: Gently pull out the old thermal coupling from its connection point on the pilot burner assembly.
- Install the new thermal coupling: Insert the new thermal coupling into the pilot burner assembly, ensuring it’s securely in place.
- Reconnect the thermal coupling: Use the adjustable wrench to tighten the thermal coupling nut onto the gas control valve.
- Turn the gas supply back on: Slowly turn the gas valve back to the “on” position.
- Relight the pilot light: Follow the instructions on your water heater to relight the pilot light.
gas.areview.net/wp-content/uploads/2024/09/gas-water-heater-thermal-coupling-66dffa.jpg" alt="Gas Water Heater Thermal Coupling" width="1024" height="1024">Gas Water Heater Thermal Coupling
Testing and Troubleshooting:
- Check for gas leaks: After relighting the pilot light, use soapy water to check for any gas leaks around the connections. If you see bubbles forming, tighten the connections or apply thread sealant tape.
- Verify hot water supply: Turn on a hot water tap to confirm that the water heater is functioning correctly and delivering hot water.
Important Considerations and Safety Tips:
- Compatibility is key: Ensure that the replacement thermal coupling you purchase is compatible with your specific water heater model.
- Don’t overtighten: When tightening connections, avoid overtightening as this could damage the threads or the thermal coupling itself.
- Seek professional help when needed: If you’re uncomfortable performing this task yourself or encounter any difficulties, don’t hesitate to call a qualified plumber.
Conclusion: Keeping Your Home Safe and Warm
Replacing a thermal coupling on a gas water heater is a manageable DIY project that can restore your hot water supply and ensure the safe operation of your appliance. By understanding the role of this vital safety device and following the step-by-step guide, you can save money on professional repairs and enjoy peace of mind knowing your home is safe. Remember, always prioritize safety by turning off the gas supply and following proper procedures when working on gas appliances.